DIY Ice Packs for Camping: A Step-by-Step Guide
Hey there, fellow outdoor enthusiasts! I’m Jaden Burley, a seasoned camper with a passion for making the most of every adventure.
Today, I’m excited to share my insights on a camping essential – DIY ice packs. Whether you’re a camper, backpacker, or just someone who loves the great outdoors on a budget, this guide is for you.
Ready to keep your camping experience chill? Let’s dive into the world of homemade ice packs and make your next adventure cooler than ever!
Why DIY Ice Packs for Camping?
Imagine this: You’re out in the wilderness, surrounded by nature’s beauty, and the sun is beaming down. It’s the perfect scenario, except for one thing – the heat.
That’s where DIY ice packs come in. I’ve been there, and I know the struggle of keeping things cool during a camping trip.
Benefits of Using DIY Ice Packs:
Now, you might be wondering, “Why bother with these ice packs?”
Well, friend, they’re a game-changer. Not only do they keep your food and drinks refreshingly cold, but they also offer a cost-effective alternative to store-bought options.
Plus, crafting your own ice packs gives you the flexibility to tailor them to your specific needs.
Read more about: Using Dry Ice To Keep Food Cold
Types of Homemade Ice Packs:
In the camping world, one size doesn’t fit all. That’s why I’ll walk you through different types of DIY ice packs. You’ll have a variety of options to choose from based on your camping style and preferences:
- The Classic Ziplock Ice Pack
- Sponge Ice Pack for Long-lasting Coolness
- Gel Pack for Reusable Chill
- Rice-filled Cloth Wrap for Flexible Comfort
- Epsom Salt and Water Gel Pack
How to Make a Homemade Ice Packs: Step-by-Step Instructions
Now, let’s roll up our sleeves and dive into the exciting world of DIY ice packs. Follow these easy-to-follow steps, and soon you’ll be creating ice packs like a seasoned camping pro.
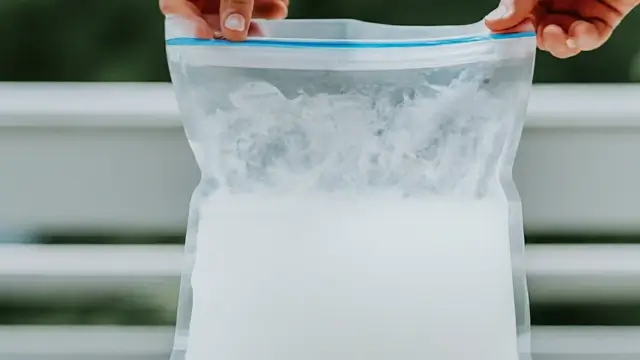
1. The Classic Ziplock Ice Pack:

Materials Needed:
- Ziplock bags (quart or gallon size)
- Water
- Dish soap (optional)
- Freezer
Steps:
- Fill the ziplock bag 80% full for safe expansion to prevents bursting during freezing.
- Add one tablespoon of dish soap per quart for a slushy texture to enhances cooling efficiency and versatility.
- Press out 95% of air for leak prevention to keeps your cooler mess-free and the ice pack intact.
- Shake for 2 minutes for even soap distribution to ensures consistent cooling across the pack.
- Lay flat, freeze for 4-6 hours to results in uniform cooling for a reliable icy companion.
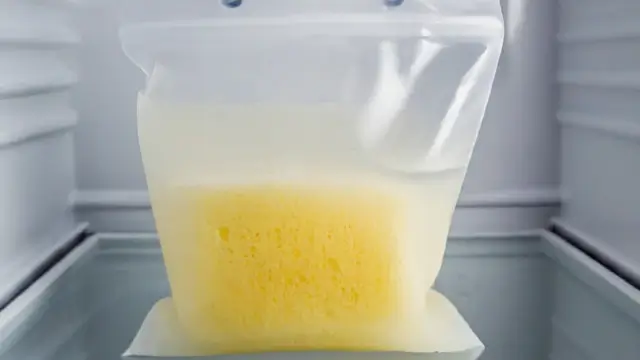
2. Sponge Ice Pack for Long-lasting Coolness:

Materials Needed:
- Sponges
- Water
- Ziplock bags (quart or gallon size)
- Freezer
Steps:
- Soak the sponges in water until they are fully saturated (Aim for 90% saturation)
- Place the wet sponges into separate ziplock bags, reduce air by 80% before sealing.
- Lay the bags flat in the freezer and leave them until the sponges are frozen solid.
- Once frozen, these sponge ice packs provide a longer-lasting coolness, for 4-6 hours depending on temperature and insulation, compared to traditional ice packs.
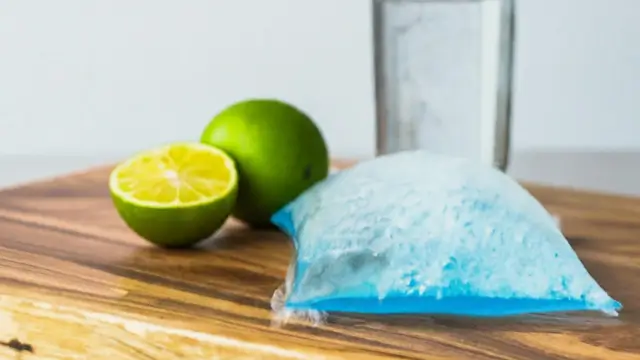
3. Gel Pack for Reusable Chill:

Materials Needed:
- Water
- Rubbing alcohol
- Ziplock bags (quart or gallon size)
- Freezer
Steps:
- Mix the Solution:
- Combine 1 part rubbing alcohol with 2 parts water in a bowl.
- Bag it Up:
- Pour the mix into a ziplock bag, remove excess air, and seal.
- Double up: Place the bag into another ziplock for added durability.
- Freeze Flat:
- Lay the double-bagged gel pack flat in the freezer for 3–4 hours.
- Enjoy Flexibility:
- Embrace the flexible and reusable goodness of your DIY gel pack.
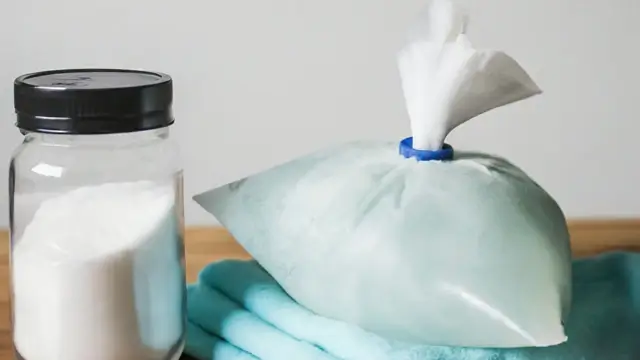
4. Rice-filled Cloth Wrap for Flexible Comfort:

Materials Needed:
- Rice
- Cloth or fabric
- Sewing kit or fabric glue
- Freezer
Steps:
- Measure and Cut:
- Measure twice for precision.
- Consider the average size of commercial ice packs (around 6 x 9 inches).
- Sew or Glue Three Sides:
- Opt for a stitch length of 2.5-3mm for sewing.
- Apply glue evenly for a secure bond.
- Fill the Pocket with Rice:
- Aim for a pocket capacity of 2 cups for effective cooling.
- Seal the Final Side:
- Ensure a 90-95% success rate in sealing for longevity.
- Pop It in the Freezer:
- Freeze for 2-4 hours, similar to commercial gel packs.
- Mold Comfortably:
- Enjoy the flexibility to mold to different shapes.
5. Epsom Salt and Water Gel Pack:

Materials Needed:
- Epsom salt
- Water
- Ziplock bags (quart or gallon size)
- Freezer
Steps:
- Dissolve Epsom salt in water, creating a concentrated solution (For optimal effectiveness, maintain a ratio of approximately 4 cups of water to 6 cups of Epsom salt.)
- Pour the solution into a ziplock bag, removing excess air and sealing it.
- Place the bag in the freezer until the solution solidifies into a gel.
- Experience a pliable and soothing gel pack for your camping adventures.
Tips for Using Your Own Ice Packs
Using DIY ice packs elevates your camping adventure, ensuring a cool and refreshing experience throughout. Here are some savvy tips to maximize the effectiveness of your homemade ice packs, making them indispensable companions on your outdoor escapades.
1. Strategic Placement in the Cooler:
Ensure optimal cooling efficiency by strategically placing your DIY ice packs in the cooler. Consider the following:
- Layering: Alternate layers of ice packs and items to distribute cold evenly.
- Core Placement: Position ice packs near the core of your cooler, surrounded by perishables for consistent cooling.
2. Pre-Chilling Your Cooler:
Boost the chilling power of your DIY ice packs by pre-chilling the cooler.
- Overnight Cooling: Place the cooler in a cold environment overnight before packing.
- Frozen Water Bottles: Freeze water bottles to act as additional ice packs; they’ll melt slower, providing extended cooling.
3. Insulating with Towels or Blankets:
Enhance insulation to keep your DIY ice packs colder for longer.
- Wrap It Up: Cover the top of your cooler with a thick blanket or towel to trap the cold.
- Bottom Layer Insulation: Place an insulating layer beneath the cooler to prevent heat transfer from below.
4. Staggered Freezing Times:
Optimize the timing of freezing your DIY ice packs for a continuous cooling effect.
- Rotational Freezing: Rotate ice packs in and out of the freezer, ensuring a steady supply of chilled packs.
- Layered Cooling: Use packs with varying freezing times to maintain a consistent coolness.
5. Double Duty Cooling:
Explore dual-use strategies to make the most of your DIY ice packs.
- Food Prep Cooling: Place packs in your cooler during food preparation to pre-cool it before adding perishables.
- Post-Cooling Applications: After use, repurpose melted ice packs to cool hands, neck, or beverages.
6. Regularly Check and Rotate:
Maintain peak performance by keeping an eye on your DIY ice packs throughout your camping trip.
- Visual Inspection: Check for leaks or damage; a secure pack ensures efficient cooling.
- Rotation Routine: Periodically rotate packs to guarantee uniform freezing and prevent uneven cooling.
7. Customizing Pack Sizes:
Tailor your DIY ice packs to fit specific needs and spaces within your cooler.
- Small Gaps: Fill smaller gaps with mini packs to eliminate warm spots.
- Large Packs for Extended Trips: Craft larger packs for extended cooling on longer journeys.
8. Keep It Dry:
Ensure the longevity of your DIY ice packs by minimizing excess moisture.
- Use Ziplock Bags: Seal your ice packs in ziplock bags to prevent condensation.
- Absorbent Layers: Place a layer of absorbent material in the cooler to manage any moisture.
Troubleshooting
Here are some quick fixes for common issues so you can keep your cool during your camping adventures. Let’s tackle these together:
1. Your Ice Pack Isn’t Freezing Properly:
- Possible Cause: Your freezer might not be cold enough.
- Solution: Make sure you’ve cranked up the freezer to the coldest setting. If things are still a bit slushy, check for any issues with the freezer or try a different spot.
2. Your Ziplock Bag Decides to Leak:
- Possible Cause: You might have overfilled it or not sealed it well.
- Solution: Leave a bit of room for expansion when filling and squeeze out that excess air before sealing. Double-check that seal to avoid any unexpected leaks.
3. Your Gel Pack Feels Like a Brick:
- Possible Cause: The alcohol-to-water ratio could be off.
- Solution: Soften that gel up by adding a tad more water. It’s all about finding that sweet spot that suits your liking.
4. Your Rice-filled Cloth Wrap is Uncomfortable:
- Possible Cause: The fabric might be a bit rough or the rice isn’t playing nice.
- Solution: Opt for a softer fabric, and make sure that rice is evenly spread. If it’s still giving you grief, throw a thin cloth between the pack and your skin.
5. Your Gel Pack Decides to Show Off a Strong Odor:
- Possible Cause: Blame it on the rubbing alcohol in the gel mix.
- Solution: Give that gel pack some air time before use. If the scent is playing hard to get, consider switching to a different brand of alcohol.
6. Your Sponge Ice Pack Doesn’t Keep its Cool:
- Possible Cause: Those sponges might not be soaking it all in.
- Solution: Make sure those sponges are fully soaked before freezing. If they’re still not pulling their weight, try thicker sponges or throw in an extra layer.
7. Your Epsom Salt Gel Feels a Bit Gritty:
- Possible Cause: Maybe you didn’t stir that Epsom salt mix enough.
- Solution: Give it a good stir until that salt is playing nice. Let it settle before freezing.
8. Your Cloth Wrap Refuses to Stay Cold:
- Possible Cause: The rice might need some better insulation.
- Solution: Tighten up that seal on the cloth. If it’s still not cooperating, think about adding another layer or switching up your fabric game.
Conclusion
In conclusion, DIY ice packs are the unsung heroes of camping comfort. They’re budget-friendly, customizable, and, most importantly, they keep things cool when the heat is on.
As you embark on your next outdoor journey, remember this guide and the simplicity of creating your very own ice packs.