How To Build A Log Cabin Using Trees: A Comprehensive Guide
Building a log cabin is a time-honored craft that has been used for centuries to create beautiful homes. If you’re looking for an authentic and rustic way to bring the outdoors into your home, it’s hard to beat the charm of a log cabin.
But how do you actually build one using trees? With some careful planning and the right tools and techniques, you can build an impressive log cabin from the comfort of your own backyard. So grab your ax, saw, and hammer – it’s time to learn how to build a log cabin using trees!
Choosing A Foundation For Your Log Cabin

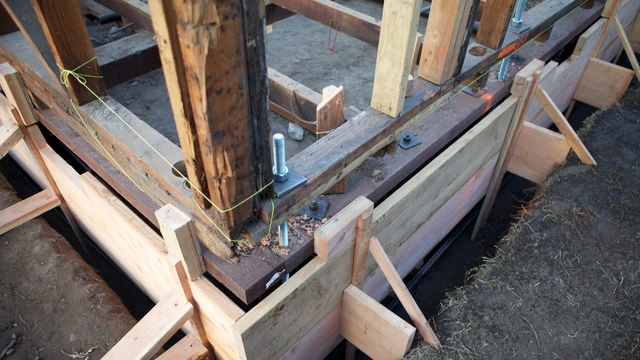
When building a log cabin, choosing the right type of foundation is key. There are two main types of foundations for log cabins: raft foundations and shallow foundations.
A raft foundation is placed on top of the ground and offers a more stable base than a shallow foundation.
This method ensures that your log cabin will remain sturdy even in areas with shifting soil, making it ideal for areas prone to earthquakes or flooding.
Additionally, raft foundations are less expensive than other options as they require minimal excavation work.
On the other hand, shallow foundations work best in places with solid ground that won’t shift or erode over time. While this option is more affordable and easier to install, it may not be stable enough for cabins located in high-risk areas.
No matter which type of foundation you choose, make sure to consider factors such as the soil composition and climate before making your decision.
With some research and careful consideration, you can ensure that your log cabin has a strong and secure foundation!
When it comes to building a log cabin, having the right foundation is essential for ensuring its stability and safety.
Whether you choose to go with a raft or shallow foundation, make sure to research your options carefully and take into account all of the factors before making a decision.
That way, you can rest assured that your log cabin will be structurally sound for years to come! Now let’s explore further into the differences between Shallow Foundations and Raft Foundations.
Shallow Foundations Vs. Raft Foundations
1. Shallow foundations are often used for log cabins located in areas with solid ground that won’t shift or erode over time.
This method is more affordable and easier to install than a raft foundation, however, it may not be stable enough for cabins located in high-risk areas.
2. Raft foundation offers a more secure and stable base as it is placed on top of the ground.
This type of foundation is ideal for places prone to earthquakes or flooding, however excavation work is required before installation.
Ultimately, when choosing between shallow or raft foundations for your log cabin, make sure to consider factors such as soil composition and climate before making your final decision.
Securing The Foundation To The Ground
Once you have all your materials ready, the first step in building a log cabin is to secure the foundation to the ground. This process can be done by either using raft foundations or shallow foundations.
- Raft foundations are typically used when there is an uneven landscape and will require more materials and labour.
- Shallow foundations, on the other hand, are better suited for flat land as they are less expensive and do not require as much work.
Make sure to research which type of foundation best suits your environment before moving forward with the build.
Additionally, pay attention to shrinkage rates and use grain sealants or paraffin wax when necessary to prevent any gaps from appearing between logs due to moisture changes over time.
Finally, don’t forget to wear safety glasses and other safety equipment when working with heavy objects like logs!
Selecting the Right Type of Tree for Your Log Cabin

Selecting the right type of tree for your log cabin is a critical step in the building process. Not all trees are suitable for use in cabin construction due to their size, weight, and other characteristics.
Advices : When harvesting wood from the forest, treat it with respect and only take what you need. Always wear safety equipment such as safety glasses when felling or working with trees and never leave debris behind on pieces of land.
Make sure to store your logs properly by covering them with paraffin wax or applying grain sealants before painting them with latex paint to protect against insect infestation and shrinkage rates.
Building a log cabin from trees is an amazing way to create something special and unique. With the right tools, knowledge and dedication, you can turn your dream of a cozy home in the woods into a reality! Now let’s explore the different types of trees that are suitable for cabin construction and find the perfect fit for your project.
Different Types of Trees for Log Cabins
The type of tree you choose for your log cabin is an important decision.
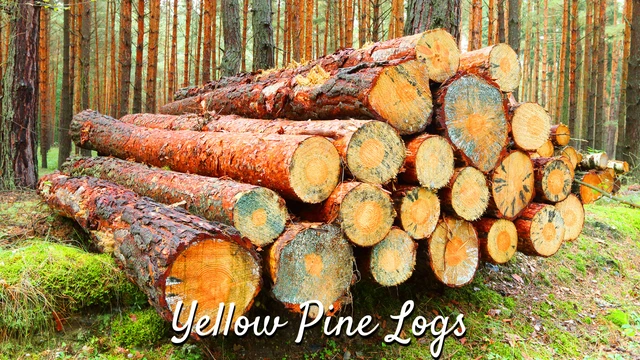
- Softwoods: such as yellow pine and spruce are usually used.
- Hardwoods: such as red oak and cedar.
- Other tree types to consider include poplar, Douglas fir, redwood, black walnut, cypress, and western hemlock.
Considerations When Selecting the Right Tree for a Log Cabin
When selecting the right tree for your log cabin, there are a few considerations to keep in mind.
- Analyze the types of trees available around you and determine which is best suited to your project. Softwood trees are lightweight and easier to work with than hardwoods which are heavier and more difficult to shape.
- Make sure that the trees you select have trunks at least 8 inches in diameter at their base so they can provide adequate support for the entire structure.
- Take into account any nearby trees that have similar dimensions so that you can complete your cabin in one go.
- Make sure to consider all important characteristics of each type of tree such as density, strength, durability, and shrinkage rates (which will affect how long the cabin will last and how it looks when finished) before deciding on the most suitable type for your log cabin project.
Gathering and Felling Trees
Gathering and preparing the trees for your log cabin is a key step in the construction process.
- You’ll need to find suitable trees with trunks at least 8 inches in diameter at their base.
- Once you’ve found the right trees, you’ll need to cut them down using proper safety equipment and techniques. When cutting, make sure to leave enough of the tree trunk intact so that it can be shaped into logs for your cabin.
- After felling the tree, it’s important to remove any bark or branches in order to prepare it for use as a log. Additionally, you may need to apply paraffin wax or grain sealants to protect them from rot and decay over time.
- You may want to paint your logs with a thin coat of latex paint or stain before building your cabin. These steps will ensure that your hand-built cabin is strong, durable, and will last for many years of weekend getaways!
Now that you know how to find and prepare the trees, it’s time to choose the right tools to harvest them.
Choosing the Right Tools to Harvest the Trees
Choosing the right tools to harvest the trees is an important step in building a log cabin.
Safety should be your first priority when selecting and using any tools, so make sure you always use protective gear such as safety glasses and gloves.
For harvesting the logs, you’ll need saws such as a chainsaw, handsaw or bow saw, depending on the size of your logs and type of tree you’ve chosen.
Additionally, you can use an axe to shape your logs into the desired dimensions for walls or other structural components of your cabin.
For preparing the logs, you’ll need a drawknife or adze to remove bark and create flat surfaces for joining.
Chisels and mallets are essential for creating notches and cutting out windows and doors in your logs. With all these tools at hand, it’s time to start building your dream cabin from scratch!
Check out this topic to learn about the 7 Essential log cabin tools.
Felling and Transporting the Trees to Your Building Site
Cutting down and transporting the trees to your building site is an important step in the cabin-building process.
First, you need to identify the trees that are suitable for log cabin construction – look for straight trunks with a diameter of at least 10 inches.
Once you’ve identified them, it’s time to cut down the selected trees using your saws. To ensure a safe felling process, make sure to clear any surrounding vegetation and have someone standing by in case of an emergency.
Once the tree is down, you can use a tractor or logging winch to transport it from its natural location on your piece of land to your building site.
Additionally, if needed, you can also get help from a professional tree service company who will be able to safely move your logs and support you throughout this important step in the cabin-building process.
Peeling, Notching and Assembling Your Logs

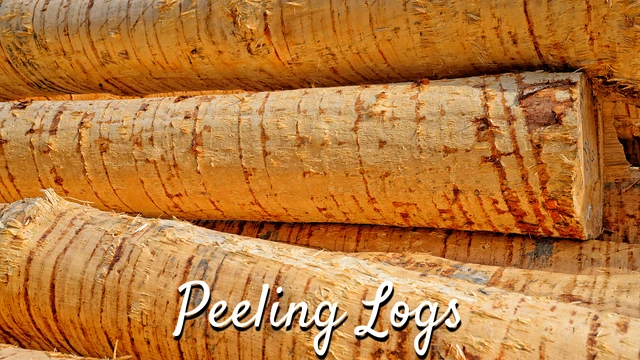
Peeling and notching your logs is a critical step in the cabin-building process. Once you’ve transported your logs to their building site, it’s time to peel away their bark so that you can expose their natural beauty and prevent them from rotting down the line.
Advice: To ensure safety, always wear safety glasses and gloves when peeling and notching your logs.
Preparing Your Wood for Peeling, Notching and Assembling
Before you can begin building your log cabin, it’s important to prepare the wood for peeling, notching and assembly.
This involves selecting the right type of tree that is at least 8 inches in diameter and cutting it into the proper lengths. For a more permanent structure, use logs that are at least 13 inches in diameter.
Once your logs are cut, you will need to transport them to their building site and peel away their bark with an axe or drawknife as it will provide a smoother finish than a power tool.
After all the logs have been peeled and cut, then you can start notching them so they fit together like interlocking pieces of a puzzle.
This technique involves cutting three sides of a square in each end of the log – two vertical cuts that create the “shoulders” of the notch, and one horizontal cut at the bottom that creates its “seat” – so that they fit together perfectly.
To ensure lasting durability and easy assemblage, make sure to seal any exposed wood grain with paraffin wax or a grain sealant like latex paint prior to assembly to protect them against shrinkage rates due to humidity swings over time.
With the peeling and notching of your logs now complete, you’re now ready to begin constructing your dream weekend getaway hand-built cabin from scratch by natural resources!
All that’s left is to put it all together and enjoy the sense of accomplishment that comes with building something with your own two hands. Learn about these 7 Essential Tools to Build a Log Cabin.
Now, let’s get ready to assemble our wood – it’s time to make this dream cabin a reality!
Note: Making Sure Each Piece Fits Perfectly Together Finishing Touches on Your Log Cabin Walls
Raising the Roof & Adding Doors/Windows

Raising the roof is an important part of building your log cabin. You’ll need to use quality timber, construct the roof with support beams, and fasten the rafters in place before adding the roof boards.
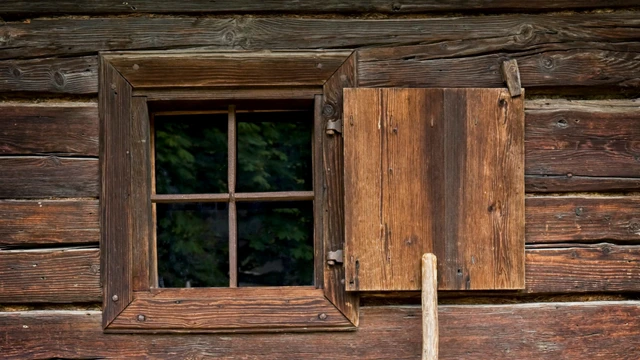
Once your roof is complete, you can add doors and windows to give your cabin a finished look. Installing windows requires cutting out a hole in the wall for each one and then properly fastening them into place.
For security purposes, make sure you install locks on all exterior doors. After these steps are completed, you’ll be ready to apply a coat of latex paint or stain for a long lasting finish that will protect your log cabin from weathering elements like rain and sun.
With just a few finishing touches, your dream log cabin will be ready to enjoy!
Now that you have a better understanding of what it takes to build your log cabin, you can make your dream come true!
But don’t forget, choosing the right type of roof for your cabin is just as important. Stay tuned to learn more about selecting the perfect roof for your cabin!
Choosing The Type Of Roof For Your Cabin
Choosing the right type of roof for your cabin is just as important as other aspects of cabin building.
The type of roof you choose will largely depend on the climate and geographic location, as well as your budget.
Popular roof options include metal, asphalt shingles, wood shake, and clay tiles.
- Metal roofs are great for areas with high wind speeds and low rain amounts because they can withstand extreme weather conditions.
- Asphalt shingles are also a popular choice because they are affordable and easy to install.
- Wood shake roofs are another option that offer an attractive rustic look; however, these require more maintenance than other types of roofing materials due to their susceptibility to weather damage.
- Clay tile roofs can provide superior durability and protection against extreme weather conditions, but these come at a higher cost than the other options.
Whichever type you choose, it’s important to make sure that your chosen roof is properly installed in order to ensure its longevity!
Installing Doors And Windows To Complete The Look
Installing doors and windows to complete the look of your cabin is an important aspect of the cabin building process.
It can be a complicated task, so make sure you understand the basics before you get started.
The most common type of door used for cabins are wooden doors, as these provide superior insulation and protection from the elements.
When choosing windows for your cabin, consider using double-paned glass as this offers extra insulation against heat loss in cold weather climates.
Additionally, you may wish to invest in special window coverings such as shutters or curtains to help reduce energy costs and maintain a comfortable indoor temperature.
Lastly, use weather-resistant sealants around all areas where two surfaces meet (doors, windows, etc.) to ensure a tight fit and protect against water damage.
With some patience and care, installing doors and windows is an easy way to add charm and personality to your log cabin!
Related : Pros And Cons Of Log Cabin Homes
Sealing & Protecting The Exterior Of Your Log Cabin
Once the foundation has been secured to the ground and logs have been placed in their proper positions, it is time to seal and protect the exterior of your log cabin.
This process begins by applying a coat of latex paint or stain to the outside logs. This will help to maintain the integrity of the wood over time and create a weather-resistant barrier.
Additionally, you can use chinking material, which is specifically designed for log cabins and helps to fill any gaps between logs that may exist due to settling or shrinkage.
Chinking also helps with insulation, so it is important not to skip this step in order to keep your cabin warm year-round!
Finally, caulk should be applied around all windows, doors, and other openings in order to prevent drafts from entering your cabin.
With these steps completed, your log cabin will be well on its way towards becoming a beautiful weekend getaway!
Your log cabin is now ready to be enjoyed and admired! With the proper care, your log cabin will last for years to come.
Now it’s time to protect the exterior of your log cabin from the elements and pests with a grain sealant – find out how in the next section! We recommend these Log Cabin Maintenance Tips for you.
Applying Grain Sealants To Protect Against Rotting And Insects
Grain sealants are essential for protecting the exterior of your log cabin from rotting and insect damage.
This protective coating is applied to the entire surface of each individual log, and it works by sealing out moisture and preventing insects from entering the wood.
Depending on the type of grain sealant used, it may also help reduce shrinkage rates and prevent cracking of the logs over time.
When applying grain sealants, use a brush or roller to spread an even coat across each individual log.
Make sure to pay attention to any cracks or crevices that may exist in between logs – these should be filled with caulk prior to applying the sealant.
Additionally, you may want to consider using a paraffin wax additive when applying the grain sealant in order to further protect your logs against water damage.
Once complete, your cabin’s exterior will be fully protected against rot and pests!
Applying Paraffin Wax To Protect Against Water Damage
Paraffin wax is a versatile product that can be used for a variety of purposes, such as protecting the exterior of your log cabin from water damage.
This protective coating is applied to the entire surface of each individual log and helps to seal out moisture while also providing an added layer of protection from insect infestation.
Paraffin wax can be applied with a brush or roller, ensuring an even coat across each individual log.
Additionally, make sure to pay extra attention to any crevices or cracks in between logs – these should be filled with caulk prior to applying the paraffin wax.
Once complete, you will have an added level of protection against water damage! Not only that, but paraffin wax also helps reduce shrinkage rates and prevents cracking over time – making it a great choice for anyone looking to build a durable and long-lasting cabin.
Read more about What is a Hunting Cabin? The Ultimate Guide.
How to Build a Log Cabin Using Trees – Final Thought
In conclusion, building a log cabin is not only possible but relatively easy if you have the right tools and knowledge.
Follow these steps and use the right materials to turn logs into a cozy, beautiful log home that lasts for years to come.
With your hard work and dedication, you’ll be able to make your dream of building a log cabin become reality!