How to Make Coffee with a Camping Percolator? Expert Tips for a Perfect Cup
When you’re camping, a good cup of coffee can be just what you need to start your day off right or to warm you up on a chilly evening.
While there are many ways to make an outdoor coffee, using a camping percolator is an excellent option that I used personally in all may camping trips. Not only is it easy to use, but it also produces a rich, flavorful cup of coffee.
As I’m a camper who has prepared coffee for many years, I’ll show you how to make coffee with a camping percolator step-by-step. I’ll cover everything from choosing the right percolator to cleaning and storing it after use. So, let’s get started!
What is a Camping Coffee Percolator?
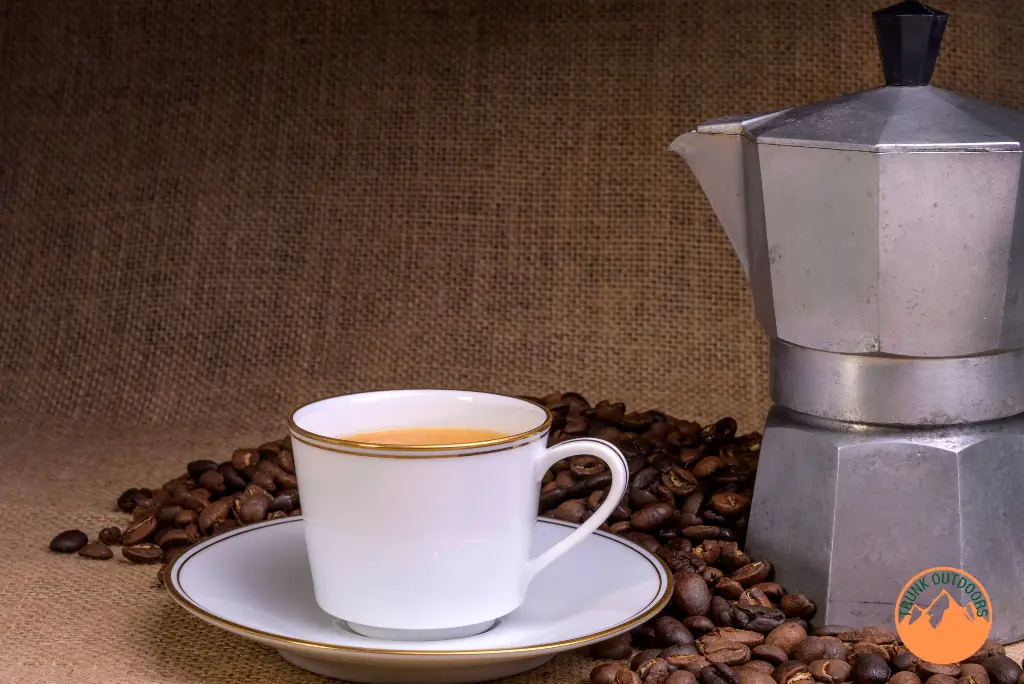
A camping coffee percolator is a specialized coffee maker designed for outdoor use. It consists of a pot with a hollow stem and a basket for coffee grounds. The stem extends from the bottom of the pot to the top, where it is connected to a lid.
How does a percolator work?
When heated, the water in the pot boils, and steam rises through the stem and into the basket, where it brews the coffee. The brewed coffee then drips back down into the pot, where it is collected and ready to be served.
Benefits and Drawbacks of Percolators
- Benefits
- Lightweight and portable, making them easy to bring on camping trips.
- Able to make coffee for a group of people.
- Can be used on a variety of heat sources, such as a camp stove or open fire.
- Provides a strong and flavorful cup of coffee.
- Drawbacks
- Risk of over-brewing if left on the heat source for too long.
- Can be difficult to clean if not taken care of properly.
- May not be suitable for those who prefer a milder or lighter coffee flavor.
How to avoid over-brewing: Pay attention to the pot and remove it from the heat source once the coffee has finished brewing.
Read also: solo winter camping tips
Choosing the Right Percolator
When selecting a camping percolator, there are some essential things to keep in mind:
- Size: Think about how many cups of coffee you typically drink in the morning and choose a percolator that will meet your needs.
- Weight: If you’re backpacking, you’ll want a lightweight percolator that won’t weigh you down.
- Material: Percolators can be made of different materials, including aluminum, stainless steel, and enamel. Consider durability, heat distribution, and ease of cleaning when choosing the material.
3 Most Popular Brands of Camping Percolators
The percolators are perfect for brewing up a hot cup of joe in the great outdoors. With so many brands on the market, it can be tough to know which one to choose.
In the following lines, we’ll highlight some of the most popular brands of camping percolators to help you find the perfect one for your next adventure.
- GSI Outdoors Glacier Stainless Steel Percolator
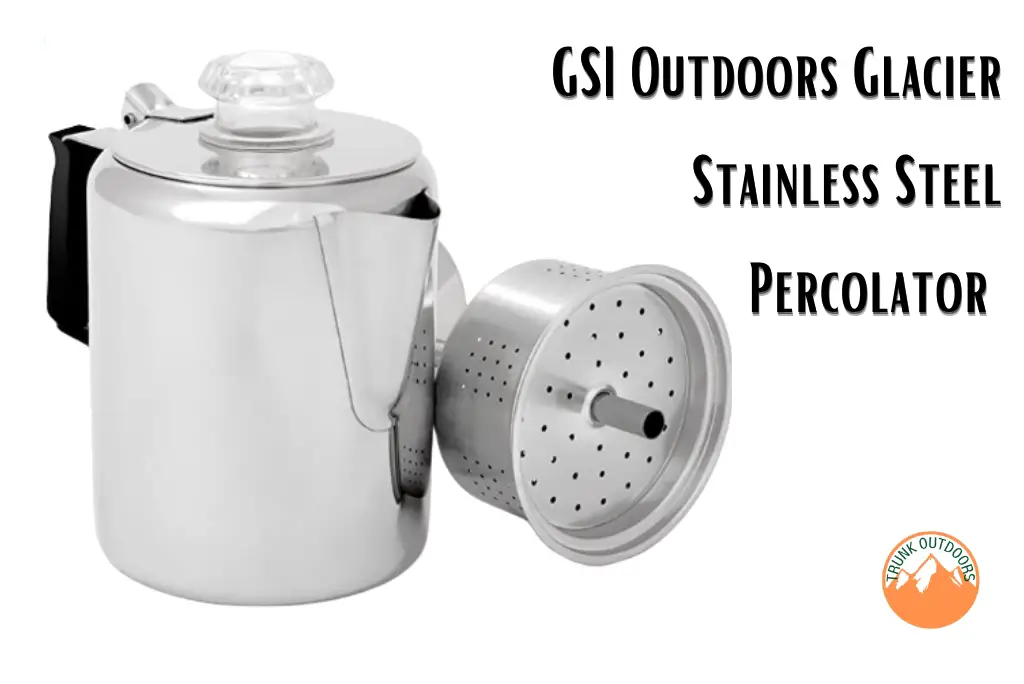
The GSI Outdoors Glacier Stainless Steel Percolator is a durable and reliable camping percolator that is designed to withstand the rigors of the outdoors. It is made of heavy-duty stainless steel and features a heat-resistant silicone handle that stays cool to the touch, even when the percolator is boiling hot.
The Glacier Stainless Steel Percolator comes in different sizes, ranging from 3 cups to 12 cups, so you can choose the right size for your camping needs. It also features a clear PercView knob that lets you monitor the progress of your coffee, and a hinged lid that makes it easy to add water and coffee grounds.
- Stanley Classic Percolator
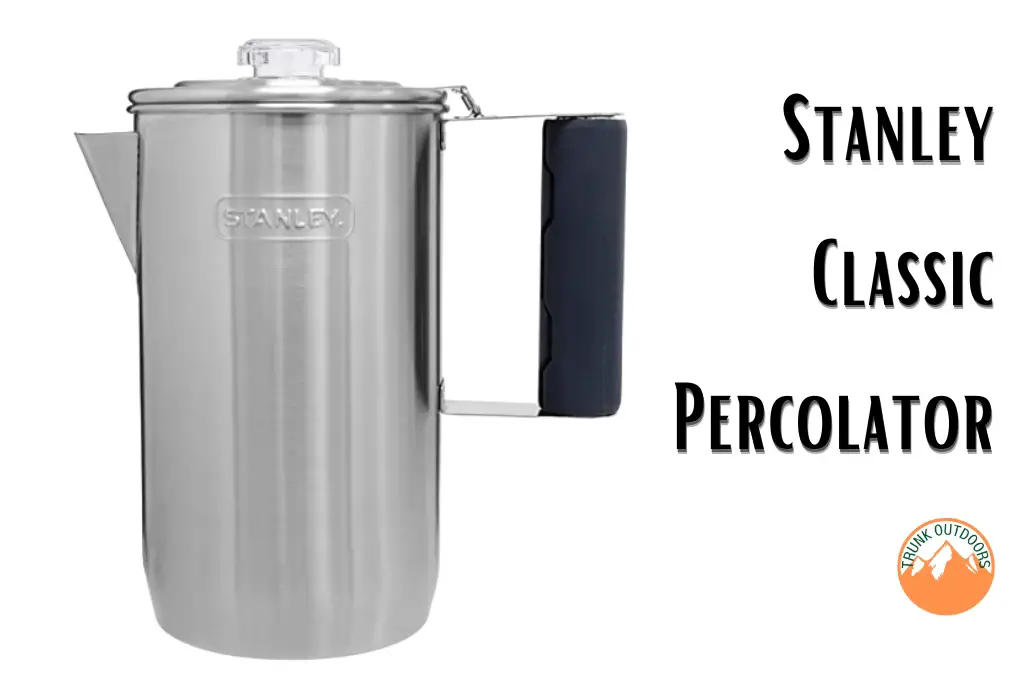
The Stanley Classic Percolator is a time-tested and popular camping percolator that has been around for decades. It is made of high-quality stainless steel that is rust-resistant and BPA-free, ensuring that your coffee is safe to drink.
The Classic Percolator comes in different sizes, ranging from 1.1 quarts to 2.1 quarts, and features a sturdy handle that makes it easy to pour. It also has a unique filtering system that ensures that your coffee is brewed to perfection every time.
- Coleman Enamelware Percolator
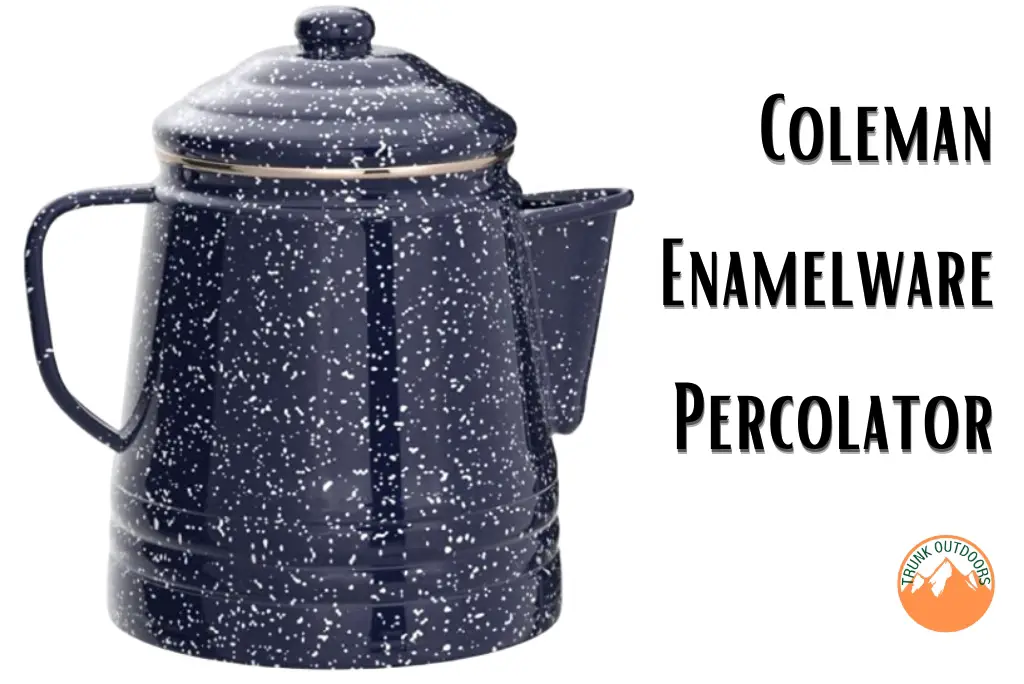
The Coleman Enamelware Percolator is a classic camping percolator that combines style and functionality. It is made of durable enamel-coated steel that is resistant to scratches and chipping, and features a wide base that ensures stability on uneven surfaces.
The Enamelware Percolator comes in different sizes, ranging from 6 cups to 14 cups, and features a clear glass knob that lets you monitor the brewing process. It also has a comfortable handle that stays cool to the touch, even when the percolator is boiling hot.
Note: These three picks are my favorite percolators, and I don’t advertise them or share any affiliate link. They are just suggestions.
Buying Guide for Camping Percolators
By considering the following factors, you can choose a camping percolator that is right for your needs and will provide you with delicious coffee on your next camping trip.
- Capacity: One of the first things to consider when buying a camping percolator is the capacity. If you’re camping with a group, you’ll need a larger percolator. However, if you’re solo camping, a smaller percolator will suffice.
- Material: Camping percolators are typically made from stainless steel, aluminum or titanium. Stainless steel is the most durable but also the heaviest, while aluminum is lightweight but less durable. Titanium is the most durable and lightweight but also the most expensive.
- Heat source compatibility: Some camping percolators are designed for use with specific heat sources, such as propane stoves or open fires. Make sure the percolator you choose is compatible with the heat source you plan to use.
- Ease of use: Look for a camping percolator that is easy to use and clean. Some models have removable parts that can be put in the dishwasher for easy cleaning.
- Brand reputation: Choose a camping percolator from a reputable brand that is known for producing high-quality camping gear.
- Price: Camping percolators can range in price from under $20 to over $100. Consider your budget and choose a percolator that offers the features you need at a price you can afford.
- Customer reviews: Check customer reviews and ratings of the percolator you’re considering to get an idea of its performance and durability.
Getting to Know the Parts of a Percolator
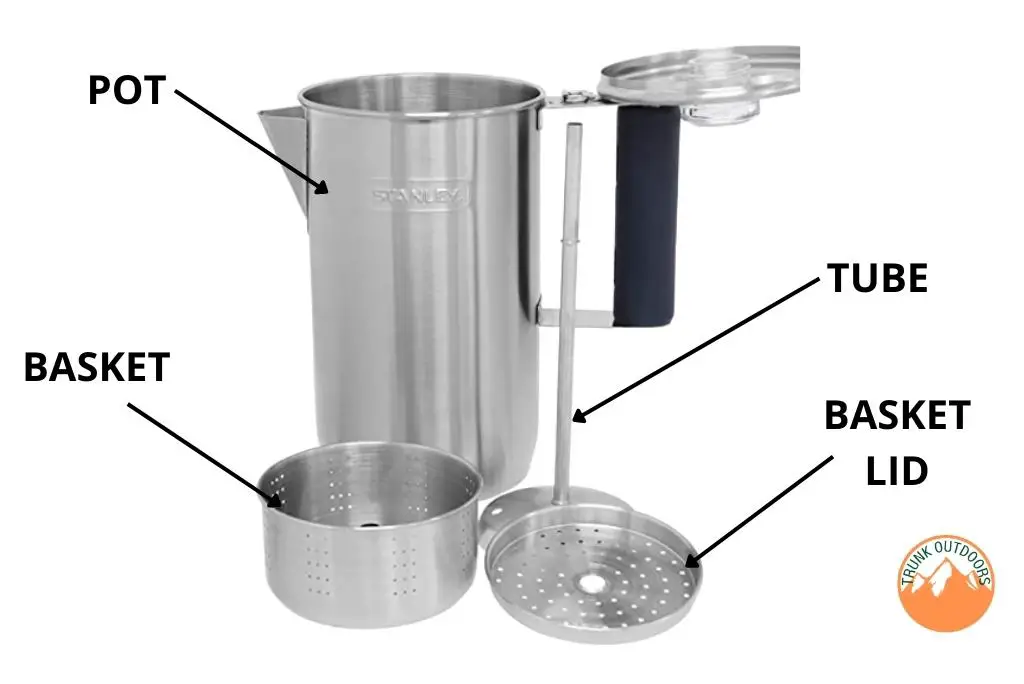
Here’s a breakdown of the different parts of a camping percolator and their functions:
- Pot: This is the main vessel that holds the water and coffee grounds. It usually has a handle, spout, and lid.
- Tube: The tube is a hollow metal or plastic rod that runs from the bottom of the pot to the top of the percolator. It is responsible for carrying the brewed coffee up to the top of the percolator.
- Stand: The stand is a metal or plastic base that the pot sits on. It usually has a heating element (like a stove or campfire) underneath it that heats the water in the pot.
- Basket:The basket is a perforated container that fits inside the pot and holds the coffee grounds. It is important to make sure the basket is securely in place in order to avoid grounds in your coffee.
- Basket Lid: The basket lid fits on top of the basket and keeps the grounds in place while allowing water to flow through.
Brewing Coffee with a Percolator
Here are some types of coffee that can be used with a camping percolator:
- Whole Bean Coffee: This type of coffee will offer the freshest flavor, but will require a grinder to be ground down to the appropriate size.
- Coarse Ground Coffee: This option is easier than whole bean coffee since it doesn’t require a grinder. Just make sure the grind is coarse enough to avoid clogging the percolator basket.
- Pre-Ground Coffee: While convenient, pre-ground coffee can lose its freshness and flavor over time.
Remember: The type of coffee you choose will impact the taste and quality of the brew, So remember always to use freshly ground coffee for the best possible taste!
How to Make Coffee With a Camping Percolator Step by Step
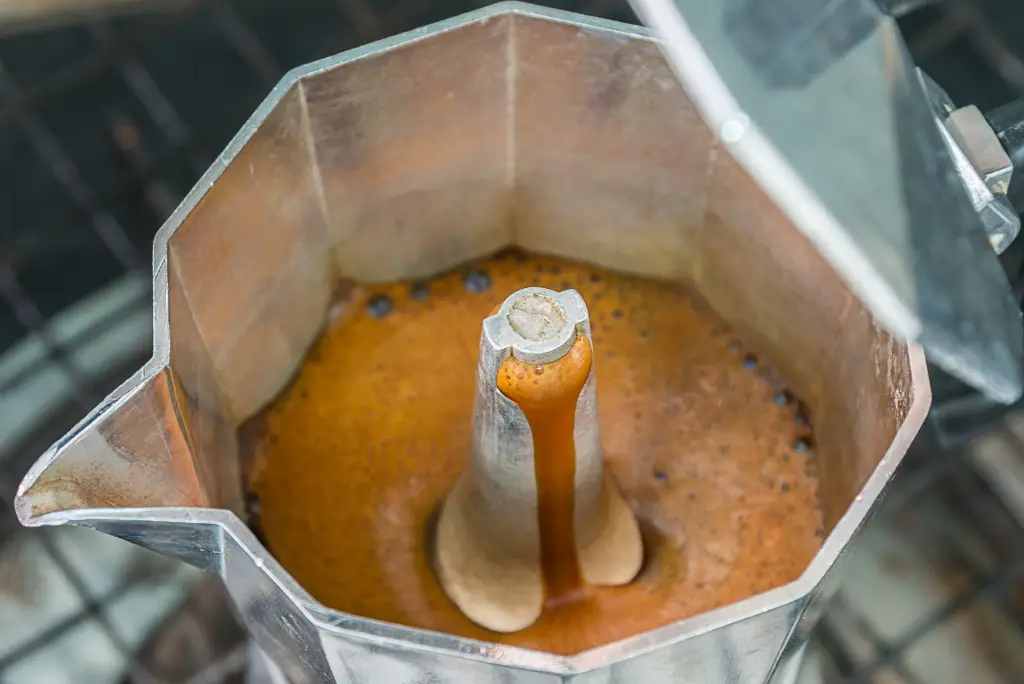
To make coffee with a camping percolator, follow this step-by-step process:
- Gather your supplies: Before you start brewing, make sure you have all the necessary supplies on hand. You’ll need a camping percolator, ground coffee, water, a heat source (such as a camping stove), and a mug or thermos.
- Fill the percolator: with water Start by filling the percolator with water up to the fill line. If your percolator doesn’t have a fill line, leave about an inch of space at the top to allow for the coffee grounds to expand.
- Add coffee grounds: Next, add the coffee grounds to the percolator basket. A general rule of thumb is to use one tablespoon of coffee grounds per cup of water, but you can adjust this based on your personal taste preferences.
- Assemble the percolator: After adding the coffee grounds, assemble the percolator. Make sure the basket is securely in place and the lid is tightly sealed.
- Heat the percolator: Place the percolator on your camping stove or heat source and turn on the heat. You’ll want to bring the water to a boil and then reduce the heat to a simmer. This will ensure that the coffee brews properly without boiling over.
- Brew the coffee: Allow the coffee to brew for 7-10 minutes. You can adjust the brewing time based on your personal taste preferences. If you prefer a stronger cup of coffee, you can let it brew for a bit longer.
- Remove from heat and let it cool: Once the coffee has finished brewing, remove the percolator from the heat source and let it cool for a few minutes. This will allow the coffee to settle and prevent any grounds from making their way into your cup.
- Serve and enjoy: After the coffee has cooled slightly, pour it into your mug or thermos and enjoy your freshly brewed cup of coffee in the great outdoors.
The Importance of Adjusting The Flame
Adjusting the flame while brewing coffee since it helps control the heat source to regulate the temperature.
This ensures that the coffee doesn’t over-brew, which can result in a bitter taste and high acidity.
Proper flame adjustment also has an impact on the brewing time and extraction rate, which can affect the flavor profile of the coffee.
Additionally, controlling the flame can prevent the coffee from boiling or scorching, which can deteriorate the quality of the coffee.
In summary, adjusting the flame is a key factor in producing a delicious cup of coffee.
How To Get The Perfect Coffee
To achieve the perfect coffee strength, aroma, and taste every time you brew with your camping percolator, just follow these simple tips:
- Choose high-quality beans.
The quality of your coffee beans is one of the most important factors in determining the strength, aroma, and taste of your coffee. Make sure to choose fresh, high-quality beans that are roasted to your liking.
- Grind your beans correctly.
Different brewing methods require different grind sizes, so make sure to choose the right grind for your brewing method. A coarser grind works better for French press, while a finer grind is ideal for espresso.
- Use the right amount of coffee.
The amount of coffee you use will affect the strength of your brew. A good ratio to follow is 1-2 tablespoons of coffee per 6 ounces of water.
- Control the brewing time and temperature.
Adjust the flame as needed and monitor the brewing process to ensure that the coffee is not over-brewed or under-brewed. Proper brewing time and temperature are crucial for a balanced and delicious cup of coffee.
- Experiment with different brewing techniques.
Don’t be afraid to try different brewing techniques, such as adding spices or using different types of water. This can add unique flavors and aromas to your coffee and help you discover your favorite brewing method.
- Store your coffee properly.
After opening the bag of coffee beans, store them in an airtight container to maintain their freshness. Keep the container in a cool, dry place away from direct sunlight to prevent the coffee from going stale.
Cleaning Your Camping Coffee Percolator
Cleaning your camping coffee percolator is essential to ensure it lasts for many camping trips to come. Here’s how to clean your percolator:
- Let it cool: Once you’re finished brewing coffee, let the percolator cool completely before cleaning it.
- Disassemble the percolator: Take the percolator apart, including the stem and basket and remove any remaining coffee grounds.
- Clean the parts: Wash the components with warm, soapy water, and rinse thoroughly with clean water. Make sure to remove any coffee grounds or residue, use a vinegar solution or a specialized cleaner designed for coffee makers.
- Dry the parts: Once the parts are clean, dry them thoroughly with a towel or let them air dry.
- Reassemble the percolator: Put the percolator back together, and it’s ready to use again.
Read more about: campsite safety tips
The Importance of Cleaning and Storing The Percolator Correctly
Here are some tips for emphasizing the importance of cleaning and storing the percolator correctly:
* Improves the taste of coffee: Proper cleaning ensures that no coffee residue remains in the percolator, which can cause subsequent brews to taste stale or bitter.
* Extends the life of the percolator: Regular cleaning of the percolator prevents build-up of mineral deposits, which can cause damage to the heating element and shorten the lifespan of the appliance.
* Prevents contamination: Cleaning and sanitizing the percolator after each use helps prevent the growth of harmful bacteria and ensures that your coffee is safe to drink.
* Proper storage protects the percolator: Storing the percolator in a dry, clean place, preferably with the lid off, prevents rust and other forms of damage that can occur over time.
Conclusion
Using a camping coffee percolator is a great way to enjoy a delicious cup of coffee while you’re out in the wilderness. With a little preparation and care, you can make great coffee with your percolator and enjoy the taste of freshly brewed coffee even when you’re camping.
If you found our guide helpful, don’t hesitate to share it with your camping friends and family so they too can enjoy a great cup of coffee in the great outdoors!
FAQs
-
How much coffee should I use in my camping coffee percolator?
The amount of coffee you use will depend on the size of your percolator and how much coffee you want to make.
-
Can I use a camping coffee percolator on an open flame?
It’s best to use a camping coffee percolator on a camp stove or other heating source designed for cooking.
-
Can I make espresso with a camping coffee percolator?
No, a camping coffee percolator is not designed to make espresso.