How to Start a Fire Without a Lighter
A fire starter is a material or tool designed to ignite a fire easily. It’s a crucial camping accessory that helps initiate flames, making it simpler to build and maintain a campfire.
It come in various forms, including waterproof matches, lighters, and specially treated materials that catch fire quickly, ensuring a hassle-free process of starting a fire in outdoor settings.
Knowing how to start a fire without a lighter is an essential survival skill. Whether you’re camping in the wilderness, hiking in the mountains, or dealing with a power outage, there are many times when you may need to start a fire without modern tools.
There are many different ways to start a fire without a lighter, but some of the most common and effective methods include:
- Flint and steel
- Bow Drill
- Hand drill
- Magnifying glass
- Battery and steel wool
- Fire Piston
- Fire Plow
- Chemical Reaction
- Ice Lens
- Char Cloth and Flint
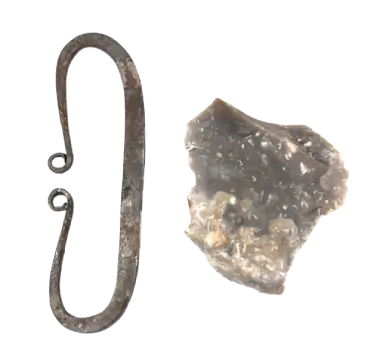
Method 1: Flint and Steel

Flint and steel are traditional fire-starting tools. Flint is a hard rock that, when struck against steel, produces sparks.
These sparks can ignite tinder, such as dry leaves or cloth, starting a fire. It’s a simple and effective method used for centuries in outdoor settings.
Get Your Campfire Going with Flint and Steel by following these steps:
- Gather Your Gear: Ensure you’ve got the essentials – dry tinder, kindling, and fuel wood. This could be anything from dry leaves to small twigs and larger branches.
- Prep Your Tools: Hold the flint securely in one hand and the steel in the other. Angle the steel against the flint, leaving space for those sparks to fly.
- Spark It Up: Give it a swift and strong strike – steel against flint. Make those sparks count by directing them onto your prepared tinder. Repeat until you catch that spark.
- Ignite the Tinder: Once that spark hits the tinder, nurture it. Gently blow on it to coax the flame. Don’t rush; make sure the tinder catches fire before moving forward.
- Build Your Blaze: Watch your fire grow as you add more kindling and small twigs. As it strengthens, introduce larger pieces of fuel wood. Keep at it until you’ve got a roaring campfire.
Read more: How To Start A Fire With Rocks?
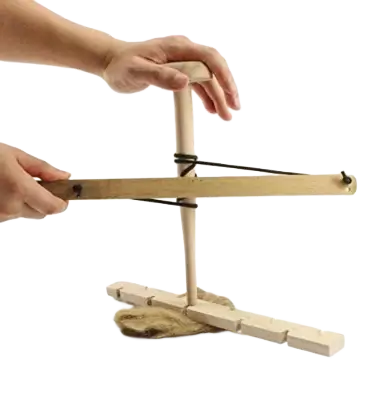
Method 2: Bow Drill
A bow drill is a primitive fire-starting tool consisting of a spindle, a bow, and a fireboard.
The spindle is rotated rapidly against the fireboard using the bow, generating friction that creates heat, eventually leading to the ignition of tinder and starting a fire.
To use a bow drill to start a fire, follow these steps:
- Gather Your Gear: Equip yourself with a spindle (straight stick), a fire board (flat wood piece), a bow, and a socket (rock or wood).
- Prepare the Fire Board: Carve a small notch on the edge of the fire board. Create a slight depression next to it for ember collection.
- Bow Setup: String the bow and place the spindle in the bowstring. Ensure the spindle snugly fits in the notch on the fire board.
- Generate Friction: Position one end of the spindle in the socket. With the bow in hand, roll the spindle between your palms, creating friction against the fire board.
- Ember Magic: As the spindle spins, heat builds. Persist until you witness a glowing ember forming in the notch.
- Nurture the Ember: Gently blow on the ember, coaxing it to life. Carefully transfer it to a tinder bundle – perhaps a mix of dry leaves and grass.
- Fire Building Time: Once your tinder bundle glows, delicately place it in your fire pit. Add small sticks and twigs gradually to fashion your roaring fire.
Read more about How To Start A Fire With Sticks
Method 3: Hand Drill
A hand drill is a simple, manual tool used for drilling holes in various materials.
It typically consists of a rotating handle or crank, a bit for drilling, and a chuck to hold the bit in place.
Users manually turn the handle, causing the bit to rotate and drill into the material.
Hand drills are often used in situations where power drills are impractical or unavailable, making them a versatile and portable tool for various DIY and camping needs.
Start your a Fire with a Hand Drillby following these easy steps:
- Gather Your Gear: Look for a dry, flat piece of wood for your fireboard. Pick a spindle (stick) and make sure it’s nice and dry.
- Prepare the Fireboard: Carve a small dent on the fireboard’s surface. Slip a piece of bark or a dry leaf under the dent to catch the ember.
- Set Up the Hand Drill: Hold the spindle upright in the dent. Position the drill between your palms, pressing down on the fireboard.
- Start Drilling: Spin the spindle between your hands briskly. Keep the pressure steady until you spy that telltale wisp of smoke.
- Catch the Ember: Once the smoke builds up, gently move the ember to your ready tinder.
- Blow to Ignite: Give a gentle blow to the ember, coaxing it to ignite the tinder.
Method 4: Magnifying Glass

A magnifying glass is a convex lens that magnifies objects when they are viewed through it.
In the context of fire starting, a magnifying glass can be used to focus sunlight onto a specific point, creating intense heat.
This concentrated heat can ignite tinder, such as dry leaves or paper, allowing you to start a fire without the need for matches or a lighter. It’s a handy and simple method for fire starting in outdoor situations.
When it comes to lighting a fire in the wild using a magnifying glass, follow these simple steps to ensure success:
1. Ideal Conditions for Solar Ignition: On a sunny day with clear skies, nature becomes your ally. Seek out dry and combustible materials in your surroundings.
2. Gathering Your Fire-Friendly Arsenal: Scout for dry leaves, paper, or any suitable tinder. Ready small sticks or twigs; they’re the heartbeat of your budding fire.
3. Focusing the Sunlight: Hold your magnifying glass, letting sunlight pass through to converge onto one spot. Direct the focused beam onto chosen tinder or dry leaves.
4. Patience: The Silent Hero of Fire-Making: Steady hands are your allies. Hold the magnifying glass firm and steady. In the realm of solar fire-starting, patience reigns supreme.
5. Nurturing the Flame: Celebrate as concentrated sunlight works its magic, igniting the tinder. Gently blow on the spark, coaxing it into a flame that dances with life.
6. Gradual Kindling for a Sustained Blaze: As your fire gains strength, introduce larger kindling. Witness flames grow, turning a simple outdoor moment into a triumph of survival and skill
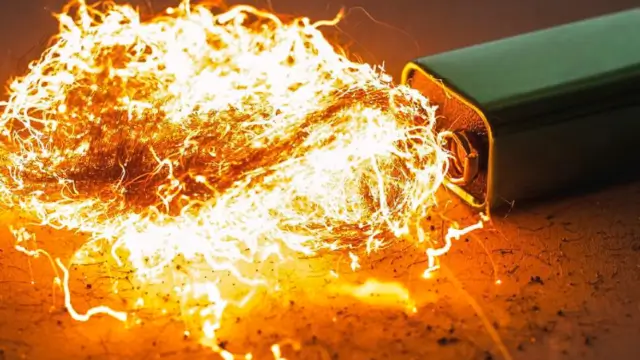
Method 5: Battery and Steel Wool

A battery is a device that stores and provides electrical energy, commonly used to power electronic devices.
Steel wool is a bundle of very fine and flexible steel fibers, often used for cleaning or polishing surfaces.
To start a fire with a battery and steel wool:
- Gather Your Gear: Get your hands on some fine-grade steel wool and ensure you’ve got a trusty 9-volt battery ready to go.
- Prep the Steel Wool: Give the steel wool a tease, creating a loose and fluffy texture that’s perfect for catching fire.
- Connect the Battery: It’s showtime! Touch those battery terminals to the steel wool and get ready for the magic.
- Watch for Sparks: Keep a keen eye as sparks start to dance, bringing the steel wool to life with flickers of light.
- Transfer to Tinder: With the steel wool ablaze, handle it carefully as you place it onto your tinder.
Method 6: Fire Piston
A fire piston is a nifty fire-starting tool. It works by rapidly compressing air, creating enough heat to ignite tinder and start a fire. It’s like giving nature a little push with some science!
To ignite a flame using a fire piston, follow these straightforward steps:
- Gather Your Materials: Make sure you have dry tinder, such as cotton balls or char cloth, and small, dry twigs.
- Load the Fire Piston: Drop a small piece of tinder into the piston’s socket, ensuring it’s snug but not overly tight.
- Prepare the Piston Rod: Apply a small amount of lubricant or oil to the piston rod for smooth movement.
- Insert the Rod: Slide the lubricated piston rod into the piston tube, creating an airtight seal.
- Quick, Forceful Motion: With a swift and strong push, compress the piston into the tube. This rapid compression generates heat.
- Ignite the Tinder: As you pull out the piston, the heated air will ignite the tinder. Be prepared to transfer the ember to your fire pit.
Method 7: Fire Plow

A fire plow is a primitive fire-starting tool. It consists of a dry piece of wood (the plow) and a groove or trench carved into a drier piece of wood.
By rapidly rubbing the plow back and forth in the groove, friction generates heat, eventually igniting the surrounding material and starting a fire. It’s a simple yet effective method in survival situations.
Follow these simple steps to harness the power of friction and ignite a campfire with ease.
- Begin with the Right Materials: Ensure you have dry, seasoned wood for the fire plow, approximately 2 feet in length. Find a flat piece of wood for the baseboard and gather small, easily ignitable dry tinder.
- Prepare Your Workspace: Select a dry and flat surface for your baseboard. Carve a groove, also known as a fire trench, along the length of the baseboard.
- Master the Plowing Technique: Insert one end of the fire plow into the groove at a 45-degree angle. Apply consistent pressure and move the fire plow rapidly up and down the groove.
- Embers Begin to Form: As you plow, the friction generates heat, transforming wood particles into glowing embers. Witness the accumulation of these embers at the end of the groove.
- Ignite Your Tinder: Once a pile of glowing embers is visible, carefully transfer them onto the prepared tinder. This is the crucial moment when the magic happens.
- Breathe Life into the Embers: Gently blow on the embers, coaxing them into a fiery dance. Exercise patience and determination as you watch the tinder catch fire.
Method 8: Chemical Reaction
A chemical reaction that starts a fire involves the combination of a fuel source, oxygen from the air, and an ignition heat. This trio creates a combustion process, releasing heat and producing flames.
It’s a fundamental process in fire starting, where the right conditions lead to the chemical reaction we commonly associate with fire.
Starting a fire using a chemical reaction can be a handy skill for campers. Here’s a simple guide using potassium permanganate and glycerin:
- Begin by gathering the essentials: potassium permanganate and glycerin.
- Now, find a fire-safe surface and place a small amount of potassium permanganate on it.
- Time to apply the magic touch. Add a few drops of glycerin to the potassium permanganate.
- Watch the chemistry unfold! The mixture will ignite, thanks to the chemical reaction you’ve set in motion.
A word of caution: Always exercise care and ensure you’re in a well-ventilated area. Safety first!
Method 9: Ice Lens
An ice lens is a natural tool for starting a fire. It’s a simple yet effective method in survival situations.
Essentially, you use a clear piece of ice to focus sunlight onto tinder, creating heat and igniting a fire.
This technique capitalizes on the magnifying properties of the ice, concentrating sunlight to generate the necessary heat for starting a fire.
To use an ice lens to start a fire, follow these steps:
- Find Clear Ice: Look for a piece of ice without impurities or bubbles for a clearer lens.
- Shape the Lens: Use your hands or a tool to shape the ice into a convex lens, like a magnifying glass.
- Angle towards Sun: Position the lens so it focuses sunlight onto the tinder. The more direct, the better.
- Ignite Tinder: Hold the lens steady, allowing the focused sunlight to ignite the tinder. Be patient and adjust as needed.
Note: This method works best with strong sunlight and takes practice.
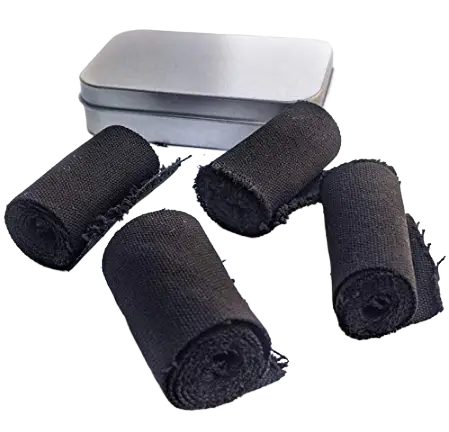
Method 10: Char Cloth and Flint

Char cloth is a material made from charred cotton or linen fabric. It’s highly flammable and catches fire easily from sparks.
Flint and steel are tools used to generate sparks by striking the flint with steel, igniting the char cloth and starting a fire.
Follow these steps for starting a fire with char cloth and flint:
- Gather Your Essentials: Begin with the basics—Char Cloth (thin fabric pieces charred in a fire) and Flint (a hard rock that sparks when struck).
- Prepare the Flint and Steel: Set the stage for success by holding the flint securely in your non-dominant hand and placing the char cloth atop the flint.
- Striking the Sparks: Time to spark the flame—employ a steel striker or a piece of high-carbon steel, striking it against the flint at a sharp angle.
- Catch the Sparks: Zero in on ignition by directing the sparks towards the char cloth and witnessing as they set it ablaze.
- Transfer to Tinder Bundle: Keep the fire alive by swiftly moving the lit char cloth to a tinder bundle and nurturing the flame with a gentle, encouraging blow.
- Build the Fire: Elevate the blaze to greatness by gradually introducing small twigs and sticks. Continue until you’ve crafted a sustainable and thriving flame.
Safety precautions when start a fire without a lighter
In the wilderness, knowing how to start a fire without a lighter is an essential skill. Follow these safety precautions to ensure a successful and secure fire-starting experience:
- Choose the Right Spot: Select an open area away from overhanging branches, dry grass, or any flammable materials. Clear the ground to create a safe zone.
- Prepare a Fire Bed: Clear away leaves, twigs, and other combustible materials. Dig a shallow pit for your fire to prevent it from spreading.
- Gather Dry Tinder and Kindling: Ensure your tinder and kindling are dry to make ignition easier. Look for materials like dry leaves, bark, or small twigs.
- Have Water Nearby: Keep a ready water source close by. This could be a water bottle, a bucket, or a nearby stream. It’s crucial to have a quick way to douse the flames if needed.
- Use Rocks as a Barrier: Encircle your fire pit with rocks to contain the fire and prevent it from spreading.
- Never Leave Unattended: Once your fire is lit, never leave it unattended. Even a small breeze can quickly turn a controlled fire into a dangerous one.
- Extinguish Properly: When you’re done, pour water on the fire and stir the ashes. Repeat until everything is cool to the touch.
Related Topics:
How To Start A Fire When Everything Is Wet?
Best Winter Gloves For Men Of 2023-2024
How To Shower While Winter Camping?